Black Background Horse Portraits — Simple cheat-sheet for Beginners
Goal: Use contrast between a well-lit horse and a dark, poorly lit background.
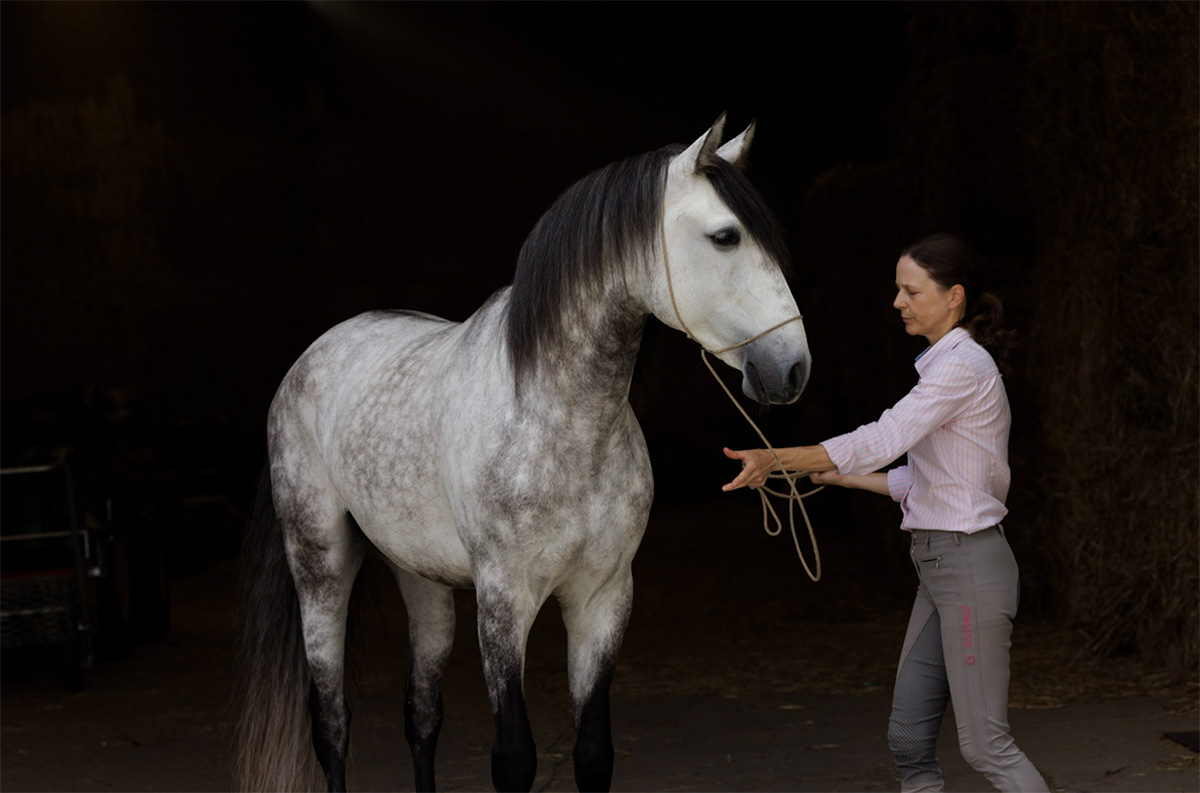
Shot in stable door, only natural light.
1. Setup
- Place the horse at the entrance of a barn, shed, or garage.
- Keep back doors closed so no light enters from behind. The goal is to keep everything behind the horse as dark as possible.
- Alternatively, use any deep shade or dark background such as a tree line, car bay, dark stable wall or arena doorway.
Dark interior – even if it’s not completely black, it will make your editing much easier.
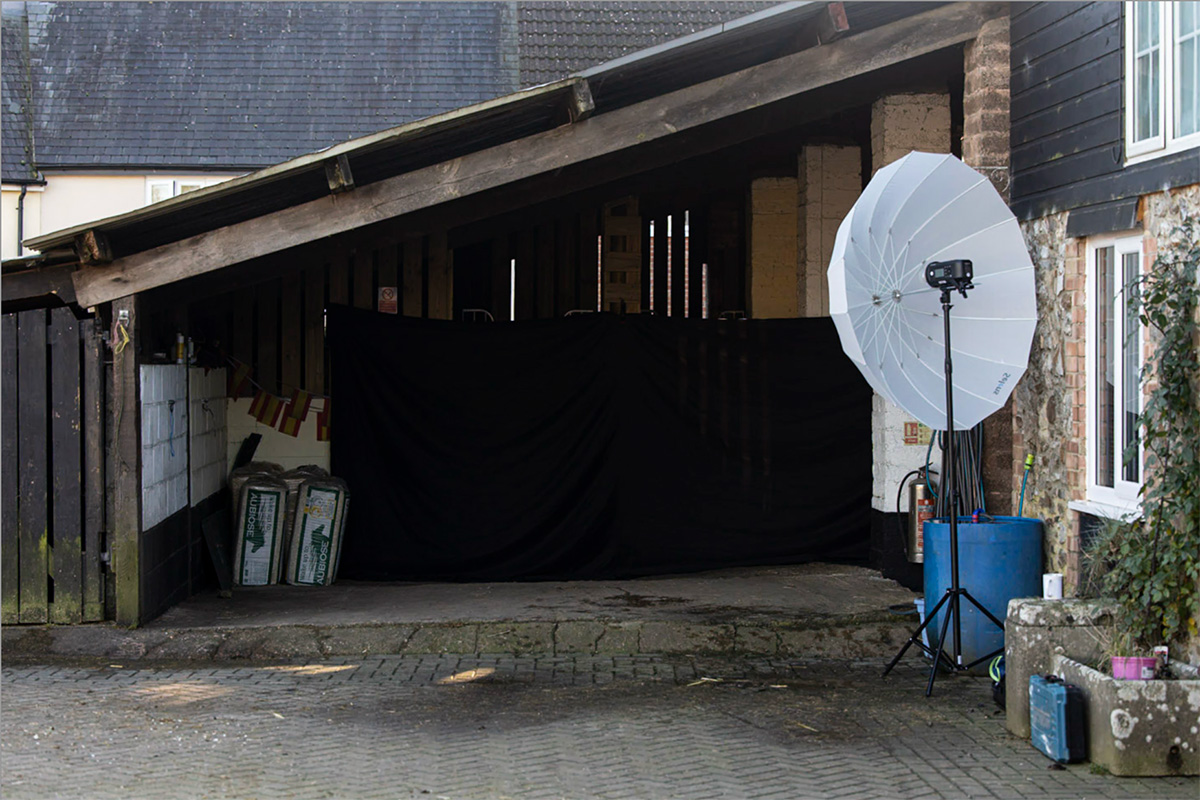
The setup in a shed. I used a big black sheet to darken it more. Strobe is prepared for some pictures but most were taken with natural light in this setup
Ideal conditions: soft light from overcast sky, dark barn alley behind. I used a sheet of black fabric inside to have it almost completely black. Thanks to that, editing those pics was really easy.
2. Light
- The horse should stand in soft, even light — open shade or an overcast day is ideal.
- Avoid direct sunlight or, even worse, uneven lighting (patches of sun on the coat).
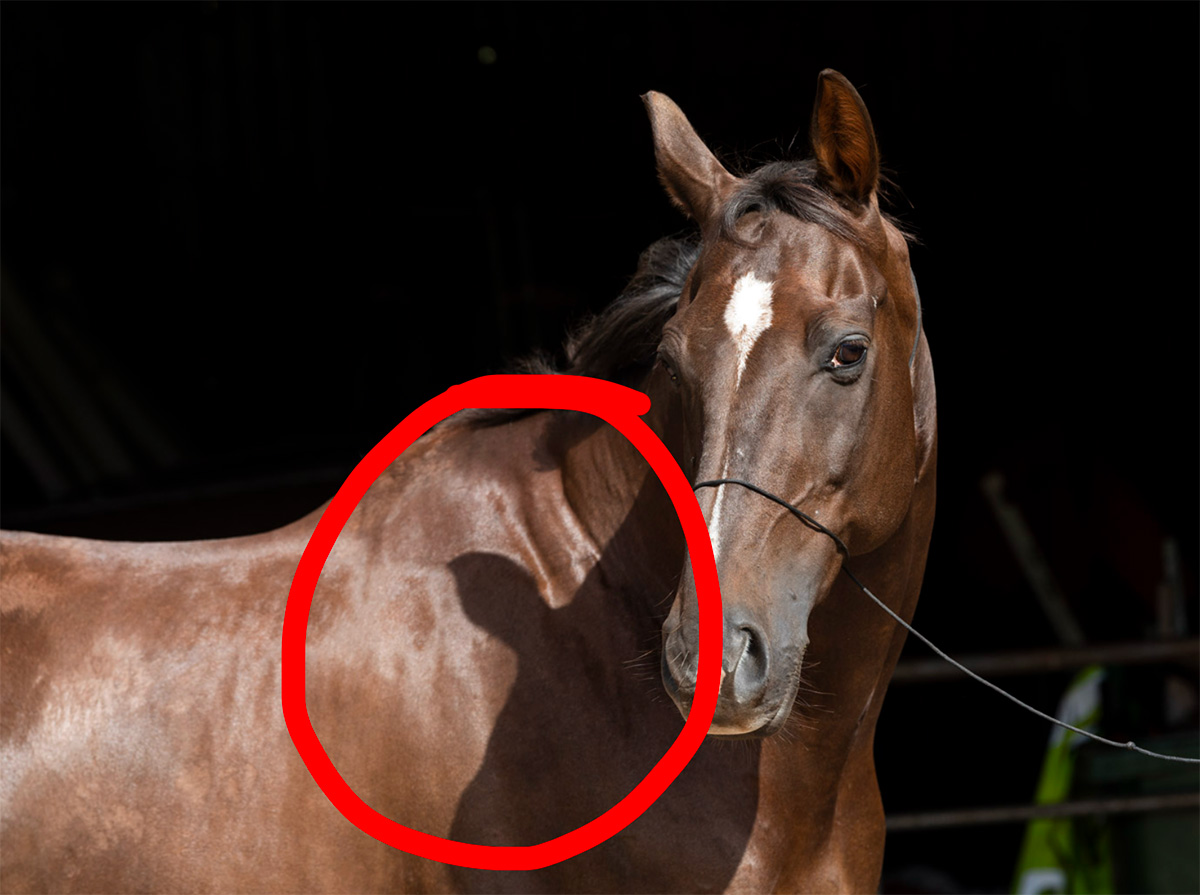
This kind of shadows should be avoided like a plague! They “cut” the subject’s shape instead of “sculpting” it. That’s why using direct sunlight can be tricky and not recommended it for beginners.
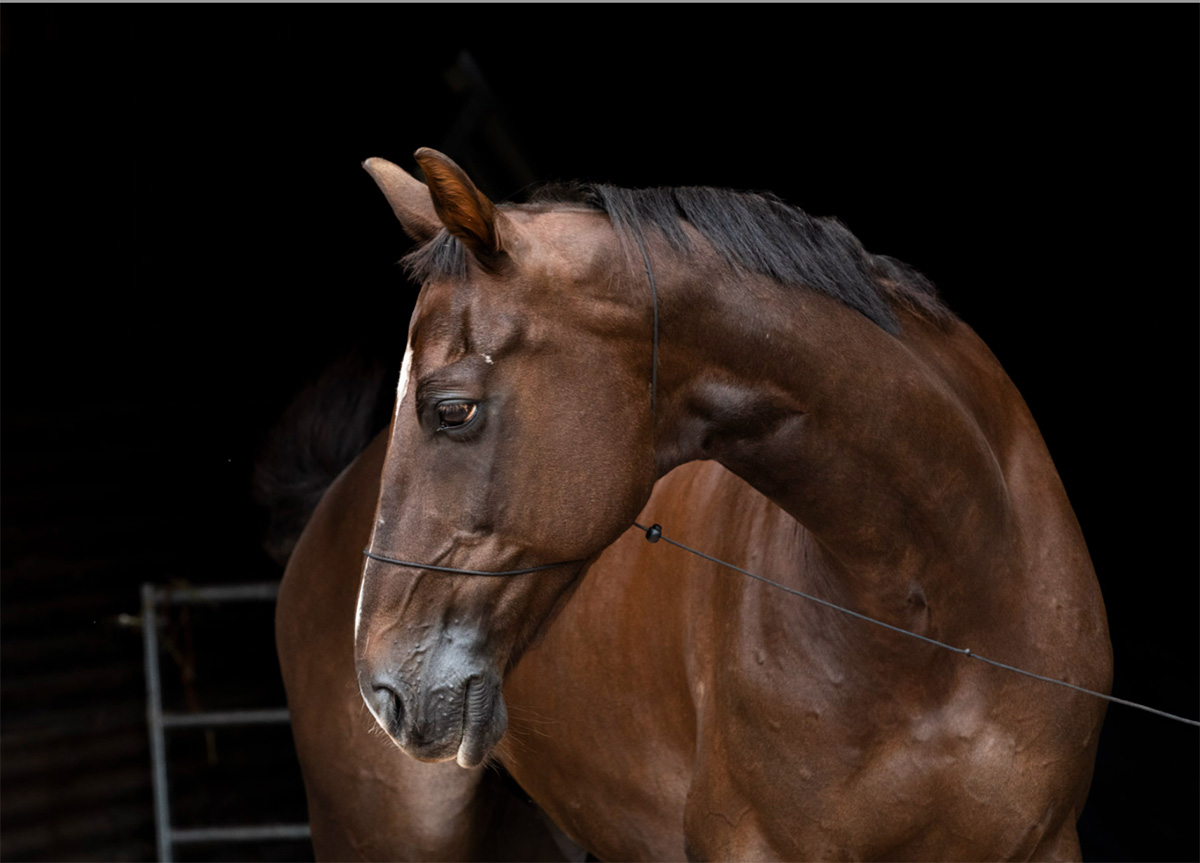
Overcast sky works like a huge softbox and ensures soft, even and “safe” lighting.
3. Camera Settings
- Shutter speed: Around 1/1000 to freeze small head or ear movements, head turns, moving mane etc..
If the light is very low and the horse stands still, you may use a slower shutter speed. - Aperture: f/5.6 – f/8 keeps the horse sharp throughout.
If the light is low, you can go down to f/4. Avoid too shallow Depth of Field – you want at least the whole face sharp. - ISO: Adjust as needed for correct exposure.
Remember — ISO is the third element of the exposure triangle.
Once you set your shutter speed and aperture, the ISO value is determined by those two settings. You can’t change ISO without changing at least one of those settings. - Exposure: Underexpose if you’re using TTL (camera) metering, not a standalone metering device.
The camera is often fooled by the dark background and tends to overexpose the whole frame.
To keep the background dark and the horse properly lit, underexpose by about 1–2 stops, depending on setup and horse colour.
Take a few test shots and adjust as needed. - Distance: Stand at least 10 meters (30 ft) away and zoom in to avoid distortion (the “big head, small body” effect).
Don’t walk closer to fill the frame — zoom instead.
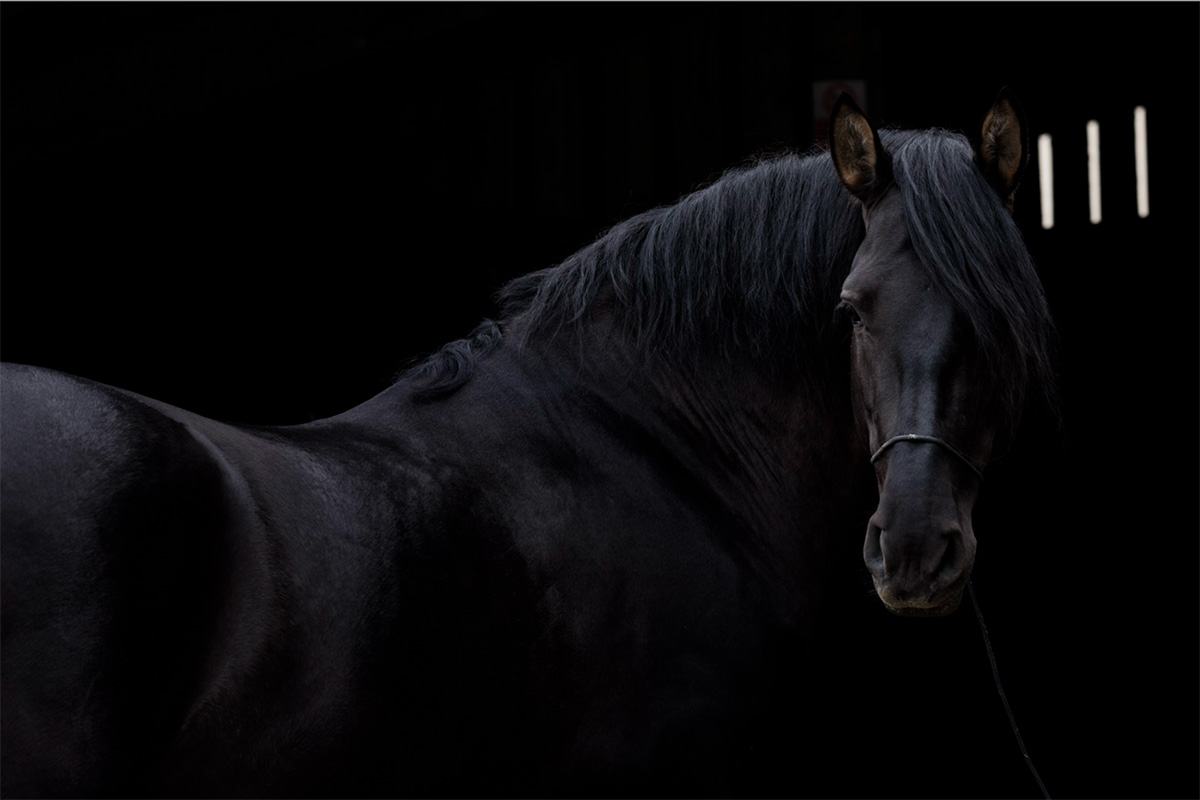
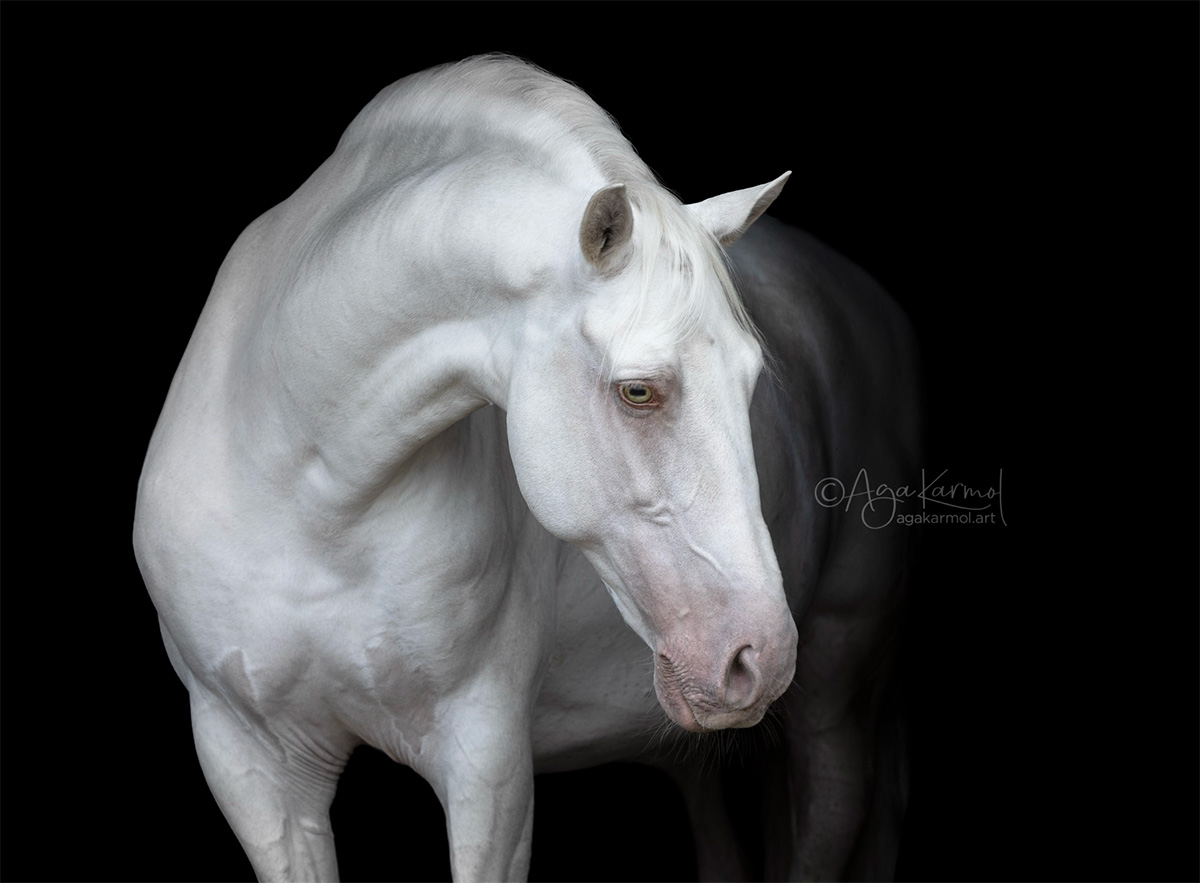
Straight from the camera: Black horse and dark shed behind – this picture needed underexposure of –2
4. Editing (in Lightroom and Photoshop)
This is where you refine the image. Final editing in Lightroom seems easier but is not that precise; Photoshop gives better effects.
The ideal workflow starts in Lightroom or Camera RAW for overall corrections, and finishes in Photoshop for masking, object removals, blacking out background and partial corrections.
Import and basic adjustments:
- Do initial colour and exposure corrections in Lightroom or Camera Raw.
- Make sure highlights aren’t blown out and the coat still has texture.
- Avoid pushing clarity, texture, or saturation too far — the image should stay elegant, not harsh.
- Open image in Photoshop.
Create a clean selection:
- Use the Select Subject tool, then refine selection manually.
- Pay close attention to edges around the mane, ears, tail, and whiskers — zoom in to ensure natural transitions.
- Avoid hard artificial outlines, and too smooth edges – without any stray hair (“cut with scissors” effect).
Darken or replace the background:
- Add a black layer behind the horse or use Curves/Levels to darken the existing background to black.
- Check that no faint shapes or textures remain visible — true black should read as a clean negative space. The slight differences in black, even when not visible on screen, can be visible in print or on other devices.
Retouching details:
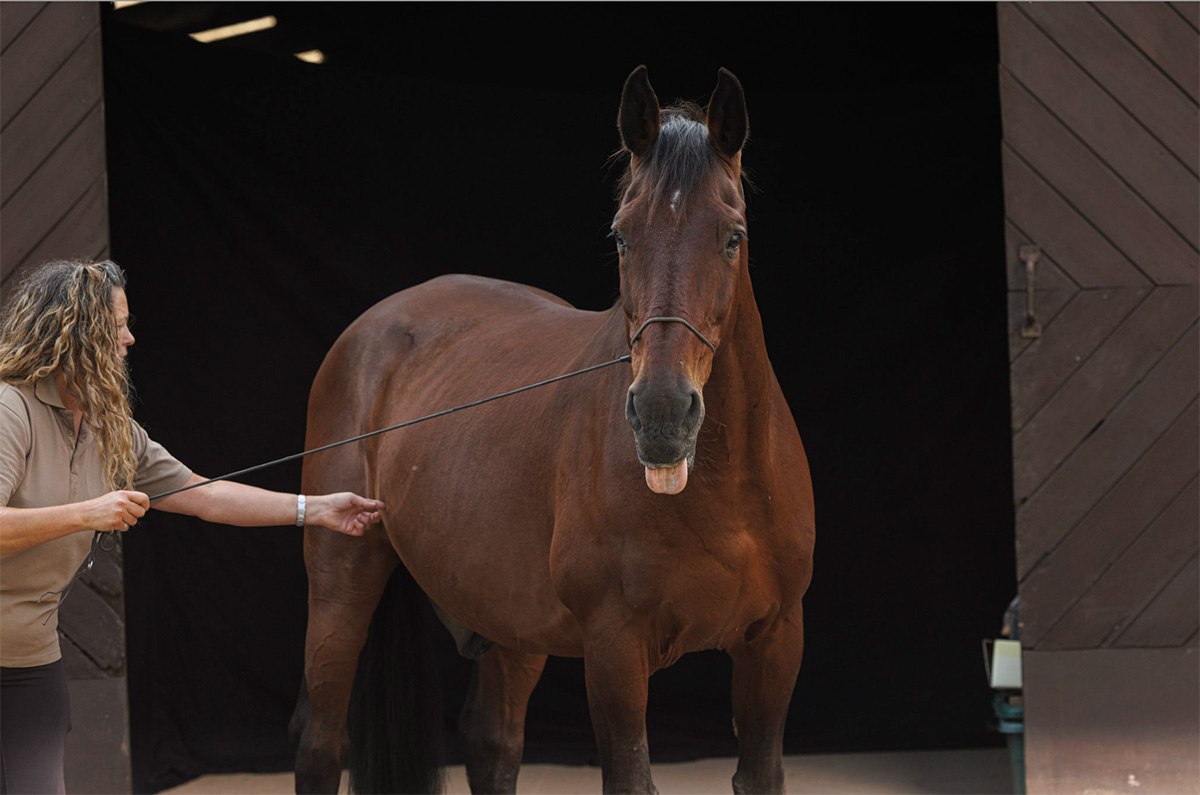
- Remove halters and minor distractions using the Healing Brush, Clone Stamp, and Remove Tool — these tools work best together; rarely will one alone give a perfect result.
- Always check retouching results at 100–200% zoom to maintain realistic texture on the coat and fur.
- Avoid visible blur or repeated patterns.
Final adjustments:
- Use dodge and burn on curves to enhance details. Do not overdo it!
- Remove possible colour casts.
5. Composition
- Keep the frame balanced.
- Think about where the viewer’s eye should land (usually near the horse’s eye).
- Simplicity works best, but avoid centering everything mechanically.
- Avoid unfortunate cropping or shapes touching the image edges.